
Set up your Iris
From a flashed card to a working remote in about 15 minutes, and the hub does most of the waiting. Each step says what the ring and the beeps will do and how long to wait, so you always know it's working. The hub never needs you to be quick.
What you'll need
Get the Iris image
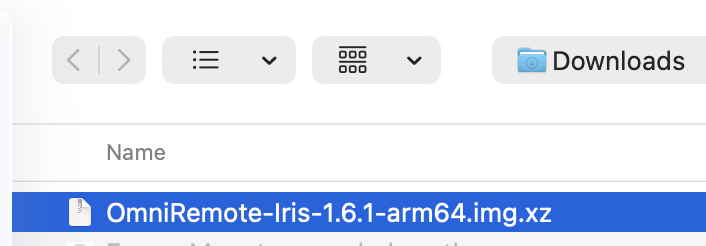
Sign in at account.omniremote.us and tap Download. It is one .img.xz file of roughly 600 MB. Leave it compressed; the card writer reads it as is.
Sign in and downloadFlash it to the microSD card5 min
Pick whichever device you have. A computer is easiest; an Android phone works with a card reader; an iPhone cannot write SD cards, but does everything after this step.
Computer (Windows, macOS, Linux)
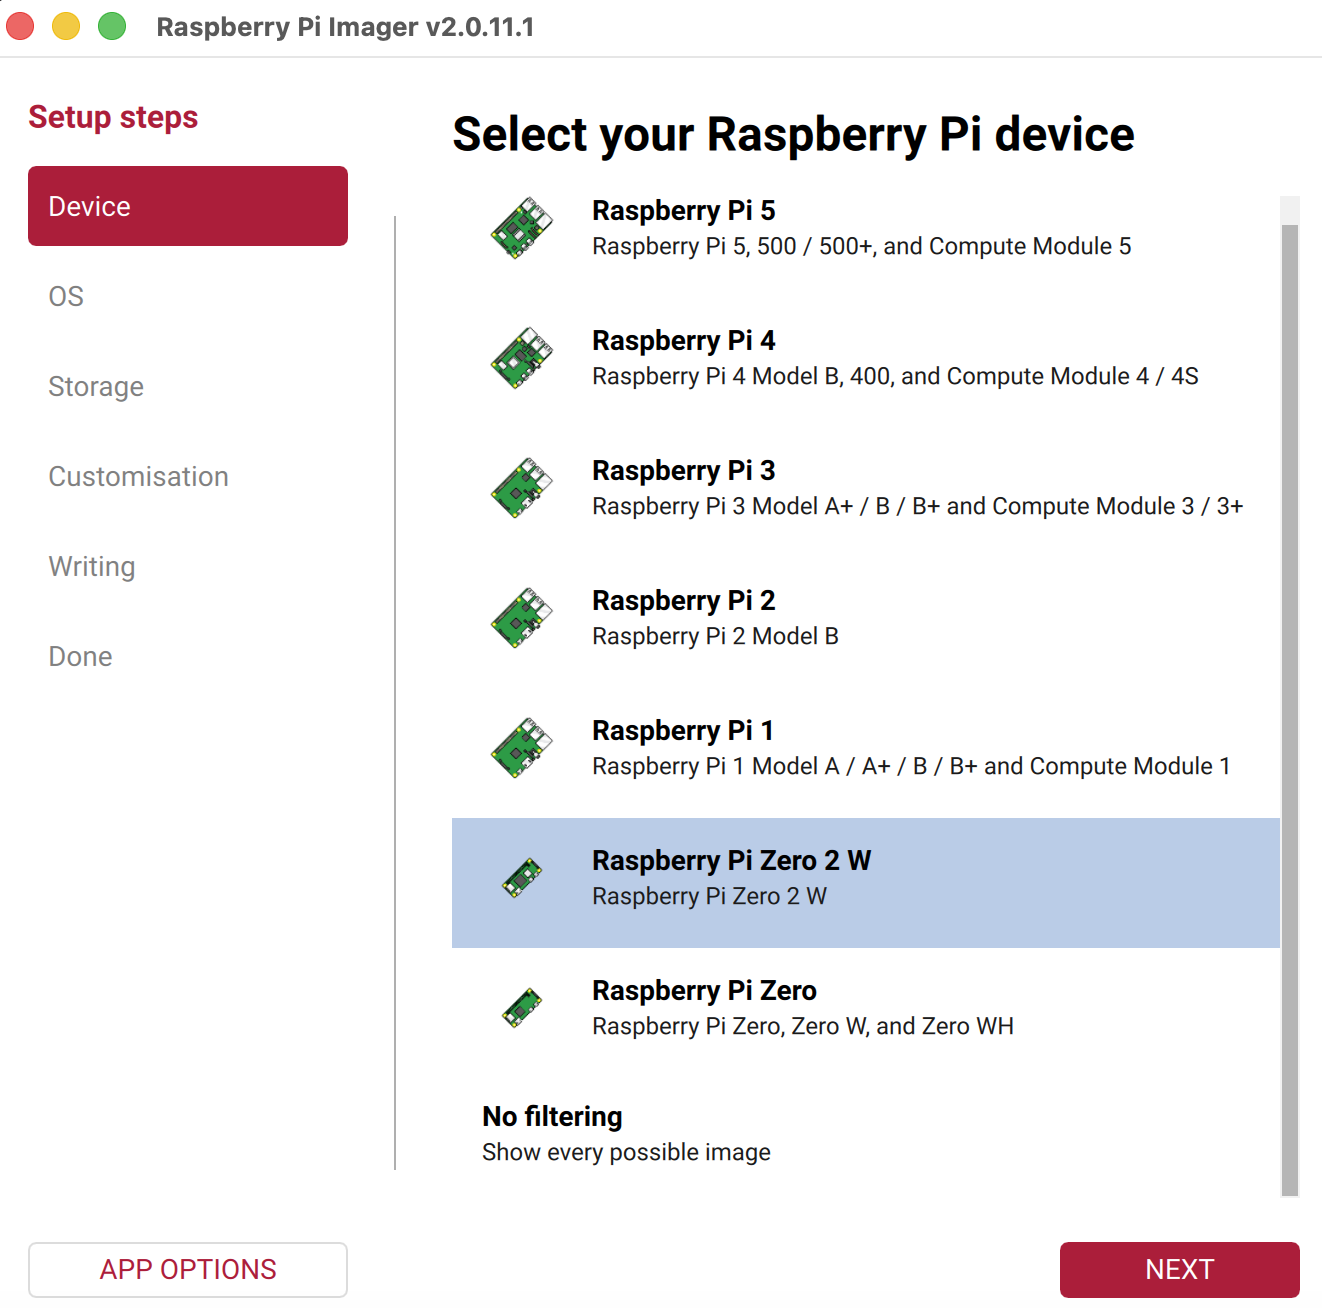
Use the free Raspberry Pi Imager.
- Choose Device: pick your Pi model.
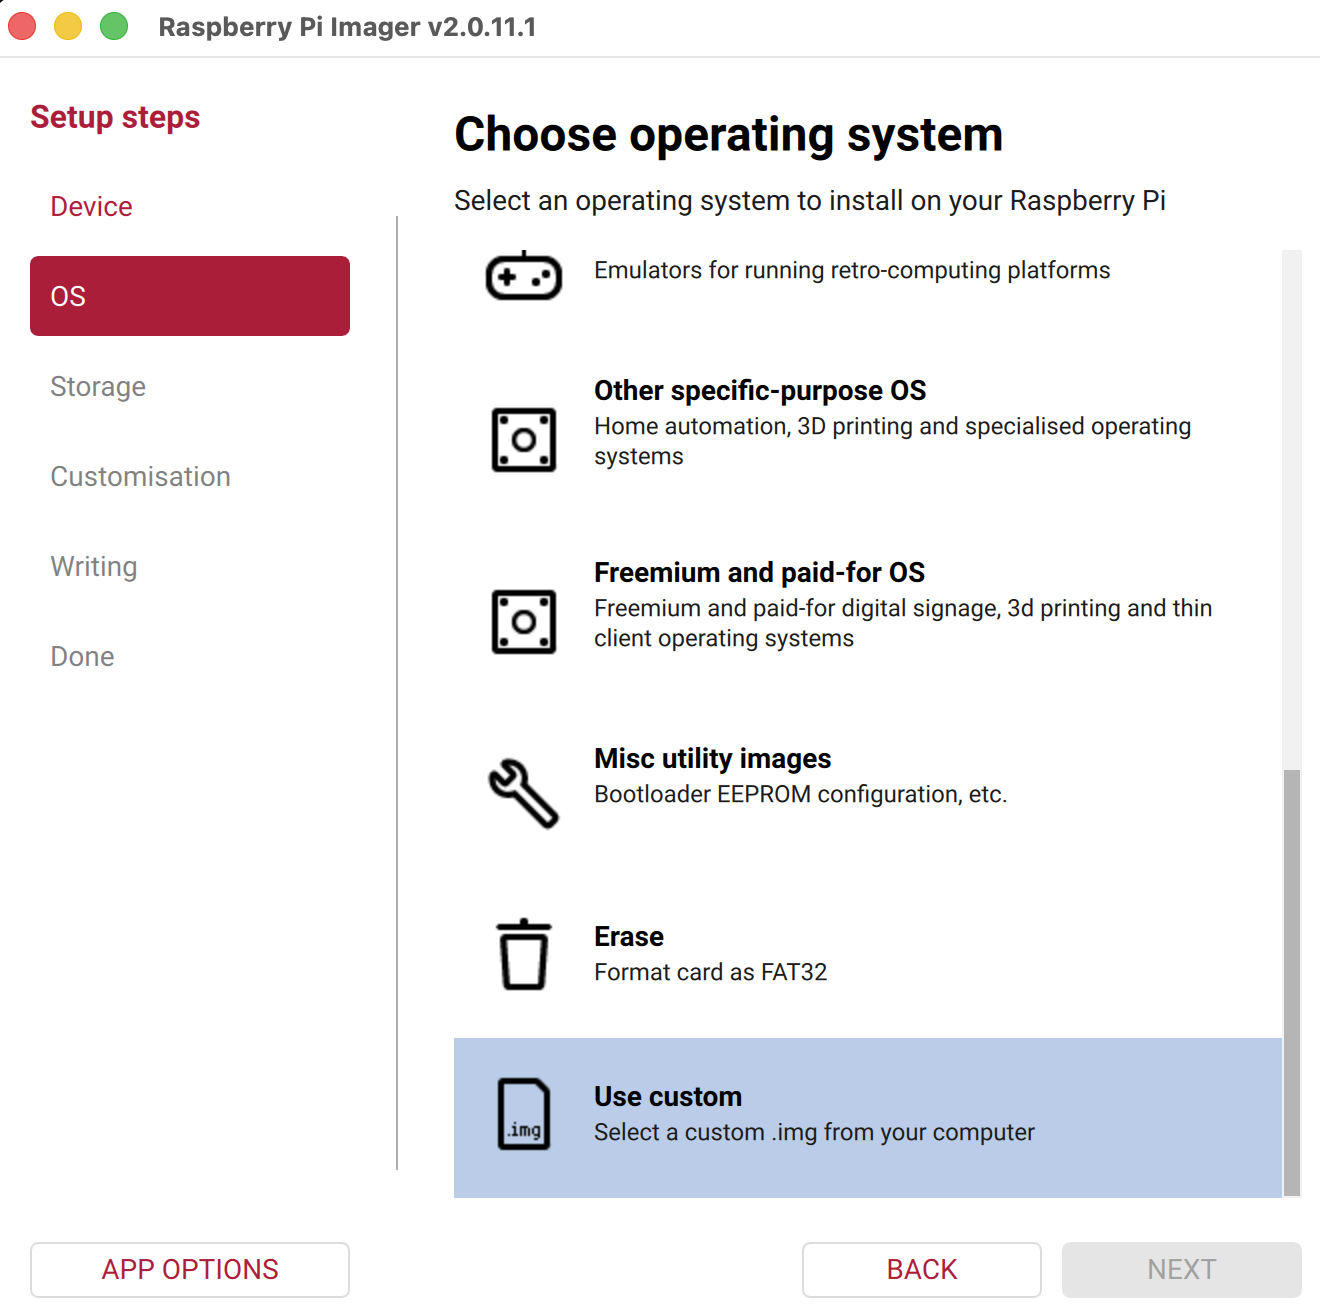
- Choose OS: scroll to the bottom, Use custom, pick the .img.xz you downloaded.
- Choose Storage: your microSD card. Then Write.
Android phone
You need a USB-C microSD card reader (or a USB-OTG adapter plus any reader) and about 4 GB free on the phone.
- Download the .img.xz on the phone and extract it with the free ZArchiver app (long-press the file, Extract here). You get a larger .img.
- Install EtchDroid (free, open source).
- Put the card in the reader, plug it into the phone, allow EtchDroid to use the USB device.
- In EtchDroid choose Write raw image, pick the .img, select the card and write. Keep the screen on until it finishes.
iPhone or iPad
iOS does not let any app write a raw disk image to an SD card, so there is no way to flash from an iPhone. Borrow any computer or Android phone for this one step. Your iPhone does everything else: WiFi setup, activation and day-to-day control.
Assemble and power on2–4 min, hands off
Seat the Iris HAT on the Pi's GPIO header, insert the flashed card, connect USB-C power. Then wait for the amber ring. The first boot is slow because the hub grows its filesystem to fill the card, restarts itself once, then generates its own security keys. Later boots take about a minute.
- 0:00wait 1–3 minGreen board light on. Ring dark.silence The hub grows the system to fill the card and restarts itself once. Nothing to do.
- ~1–3 minwait up to 1 minRing still dark.rising two-tone chime Booting. Still nothing to do.
- ~2–4 minno time limitRing breathes amber.two short equal beeps Setup mode. The hub is ready for you and waits as long as it takes. Pick a way to finish below.Instead: still dark and silent after 4 minutes = power-cycle once; if it never appears, re-flash the card.
Two ways to finish: browser or app
Both end in the same place and show the same ring cues. The browser way works today from any phone or laptop. The apps do it over Bluetooth with no WiFi switching.
Join the hub's setup WiFi, open the setup page, pick your network. Steps 4–7 below.
Open the app next to the amber hub; it finds the hub over Bluetooth and walks you through. What that looks like.
Join the setup WiFi1 min
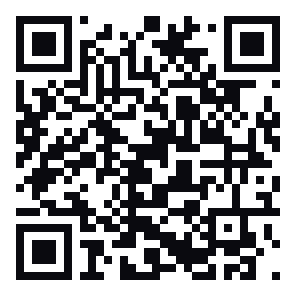
Only once the ring is amber. First turn off mobile data / cellular on your phone, otherwise it may quietly route around the hub's WiFi because it has no internet. Then scan this QR, or open WiFi settings and join OmniRemote-Iris-Setup (password omniremote). Stay on it even if the phone warns about no internet.
The ring keeps breathing amber. Nothing changes on the hub until you tap Connect in the next step.
Open the setup page and connect2 min
It usually pops up by itself. If not, open http://setup.omniremote.us (while you're on the setup WiFi the hub answers that address) or http://192.168.4.1. Pick your home WiFi, enter its password, and enter your email so we can send you your hub's link. Tap Connect & Finish Setup.
Save your hub's link. The page shows one link, omniremote.us/hub/#…, that always takes you to your hub. Tap Save / share link to bookmark it or send it to yourself. If you entered an email, you'll get it there too once the hub is online.
- on tapthen ~30 sRing flashes teal three times (a minty green that looks cyan), then stays solid teal. It keeps that colour through the restart, for a minute or two, until the purple beat starts.silence Settings accepted. The setup WiFi disappears within seconds and your phone drops off it. That's expected; go to step 6.Instead: ring blinks red and goes back to amber = the WiFi name or password was rejected; the page says what to fix, then tap again.
Switch back to your own WiFi2–3 min
Reconnect your phone to the same network you just gave the hub and turn mobile data back on. Meanwhile the hub joins your WiFi and restarts itself to finish; the cues below take it from the teal ring to the OmniRemote logo.
- ~30 safter tapRing still solid teal; nothing visible changes yet.bright rising two-tone The hub joined your WiFi and restarts itself to finish. The ring stays teal for about a minute while it restarts.Instead: a falling two-tone = it couldn't join (wrong password or out of range). See troubleshooting.
- ~1 min laterwait 30 s–1 minTeal goes out; the center light beats purple.rising two-tone chime then three rising notes Back up on your WiFi; the hub software is starting.
- ~2 minafter tapThe logo appears: purple center, white spokes, one cyan blade sweeping around the ring.two short high tones Online. The sweeping blade means "waiting for the first app or browser". Go to step 7; it waits as long as you like.Instead: purple beat but the logo never comes = on your WiFi but no internet. See troubleshooting.
Open the hub1 min
Open your saved link and tap Open my hub; it shows the hub's current address and even waits for the hub if it's still starting. Backups: http://omniremote-iris-XXXX.local:8765, or the hub's IP address with :8765.
Finding the IP: open your router's device or DHCP list and look for omniremote-iris-XXXX. XXXX is the last 8 characters of the hub's WiFi MAC address without the colons, so every hub has its own name. Give it a DHCP reservation while you're there so the IP never changes.
- first connectonceRing blooms cyan like an iris opening, then settles into the logo with the blade at rest, lower right.silence Connected. That resting logo is the everyday, all-is-well state from now on.
Reaching it later: once it's on your WiFi, the hub is a normal device on your network. From any phone, tablet or computer on the same network, open your saved link, the .local address or the IP. Bookmark whichever works for you. Lost the link? See troubleshooting.
Setup with the OmniRemote app
The app replaces steps 4–7. When it's available, this is the flow; the hub side is identical, so the ring and beeps are the same ones shown above.
- amber ringstep 3 doneOpen the app next to the hub and tap Add a hub. It finds the hub over Bluetooth; your phone stays on your own WiFi the whole time.
- in the app1 minPick your home WiFi, enter its password and your email. The app sends it to the hub.silence Ring flashes teal three times when accepted, blinks red and returns to amber if rejected.
- ~2 minhands offBright rising two-tone, dark ring, boot chime, purple beat with three rising notes, then the logo with the sweeping blade and two high tones. The app waits for it and opens the hub itself: the ring blooms cyan.
Until the apps ship, use the browser way; the hub, your link and your license carry over to the app later with nothing to redo. App status and beta access.
Activate1 min
The hub page asks you to sign in. Use the OmniRemote account you bought with; your license attaches to this hub by itself, and that account becomes the hub's administrator login.
- on sign-ina few secondsRing flashes green three times, then the resting logo.two-note chime Activated. Your license is attached to this hub.Instead: red blade blinking with two low beeps = sign-in refused; the page says why. See troubleshooting.
Set up your home5–15 min
Tap the spinning blade logo in the hub page's tab bar. That is the Setup wizard, and it is the quickest way through: it adds your rooms, then the devices in each room and how Iris talks to them, then the buttons.
- Rooms. Tap the room types you have (Living Room, Bedroom, Office…) or add your own. Tap a type twice for a second one.
- Devices. For each device pick its room, its type (TV, soundbar, receiver, streamer, projector…) and how Iris controls it: IR through the HAT, network for Roku, Samsung, LG, Vizio, Sony, Fire TV and Onkyo/Pioneer, Bluetooth, or HDMI-CEC.
- Commands. For IR devices choose where the codes come from: point the original remote at the hub and learn them, pick the brand and model from the built-in code catalog, import from a Flipper Zero, or use a Broadlink blaster you already own.
You can stop anywhere and come back; rooms already added are kept. The wizard is also the place to add a room or a device later.
- learningper buttonCyan radar sweep while the hub listens for your remote.rising three-note Code captured. Two low beeps and a red blade if it timed out; point the remote at the hub from about a foot away and try again.
Users, settings and the restas needed
Everything else lives under the Settings tab. The parts most people want on day one:
- User Accounts. Give each person in the house their own login instead of sharing yours. Your OmniRemote account stays the administrator; other users can be plain users or admins, and an admin can change a role or remove a user any time.
- Home Assistant. Pair the hub so rooms, devices and scenes appear there too. In Home Assistant the hub shows up under Settings → Devices & Services.
- Iris Light and Buzzer. Dim the ring, turn individual indicators off, or silence the beeps. Resets always show and sound.
- Physical remotes. Pair a Bluetooth remote from the room it belongs to, under Rooms.
- Mind's Eye mesh. A second hub in another room joins the first automatically; the mesh section shows who is linked.
- Software updates, logs, SSH, API. Updates install from Settings when a new version is out. Download Logs produces the bundle support asks for.
- Danger Zone. Start over erases rooms, devices and scenes; factory reset erases everything. Both ask for a backup first.
The full manual is on the hub itself: the Help tab walks through rooms, devices, the Remote Builder, physical remotes, blasters, scenes, remote access, the three ways to run it (standalone, with Home Assistant, phone and Broadlink only), an FAQ and troubleshooting. It is always the version that matches the software you are running; a copy is on this site at omniremote.us/manual.
Keep the hub online
Iris runs locally, but needs outbound internet for software updates and a periodic license check. On an isolated IoT VLAN, still allow it out.
omniremote.us · Patent Pending · OmniRemote™ is a trademark of One Eye Enterprises LLC